Hi and welcome to the first post on the Building a Modern Lakehouse Data Warehouse
series. As you can see in the video [here] we will be building a modern data warehouse using Azure Synapse Analytics with a Lake House strategy.
Today we will be focusing on moving your data from your database to the lake dynamically and in a folder structure.
Building a dynamic pipeline
Using the integration hub in Azure Synapse Studio we can build a single pipeline which can handle all the copy activities using metadata queries from our source database. For this example, we will be using an Azure SQL Database, however you can also do this for other RDBMS (relational database management systems) and on premises sources. There are some catches to building this for other RDBMS and on premises sources, however the framework we will be showing you can remain the same.
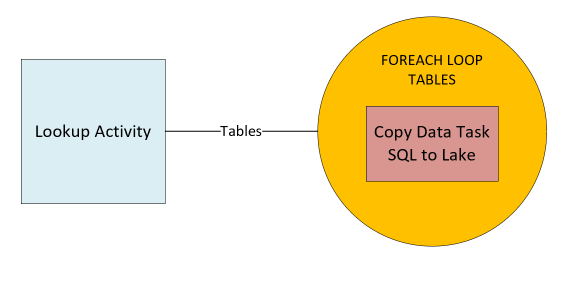
Our pipeline will consist of three main components, a Lookup Activity (or script task) to fetch our table list, a foreach loop, to loop through the metadata and a Copy Task inside the foreach loop to dynamically copy our data.
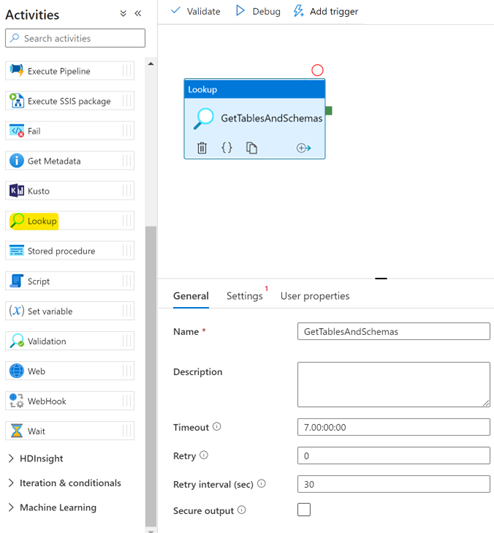
Setting up the Lookup Activity
With the lookup we will be fetching the list of tables and schemas to loop over, we will also use a dataset (Query or Table) that uses a linked service (sort of a connection string).
Let’s start by adding ia lookup task, which you can find under the general tab in the activities of a new pipeline.
Click on settings, which is where we will configure the source dataset that the lookup will use to output a JSON (JavaScript Object Notation) result set in the pipeline.
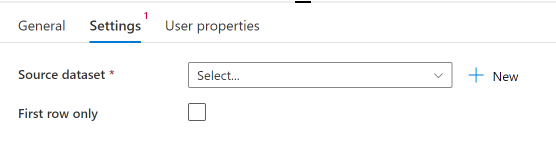
In our case we will use an Azure SQL DB as source, so we will create a new dataset based on an Azure SQL DB linked service.

First, we will name our dataset to something generic because we will reuse the same dataset for all further actions in our pipeline.
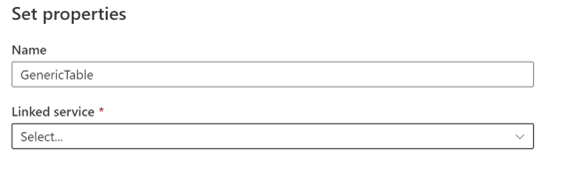
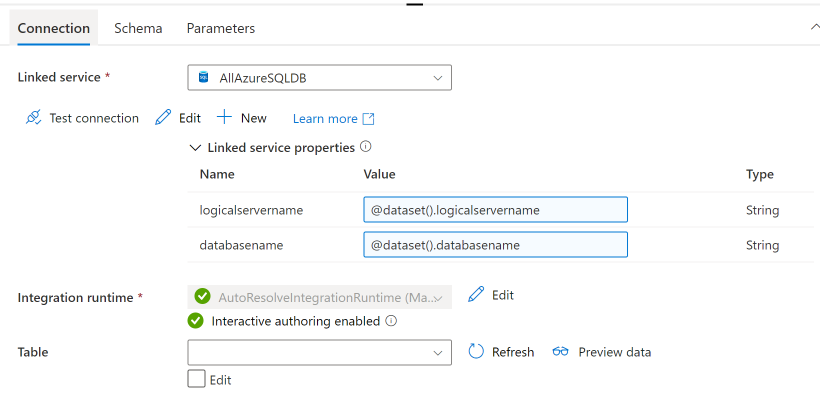
The next item we need to configure is the linked service. This is where the first dynamic part will come into play. A linked service can point to one specific server, or you can use the linked service for all your azure SQL DB connection by parameterizing the connection string.
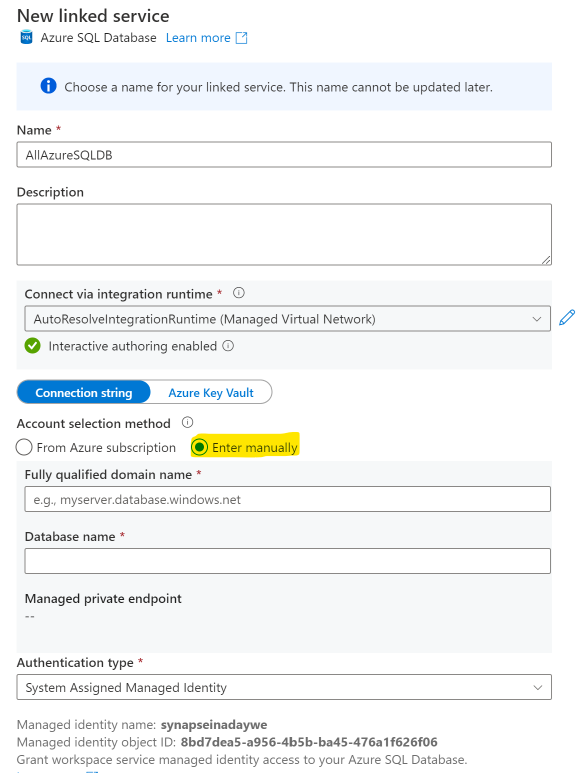
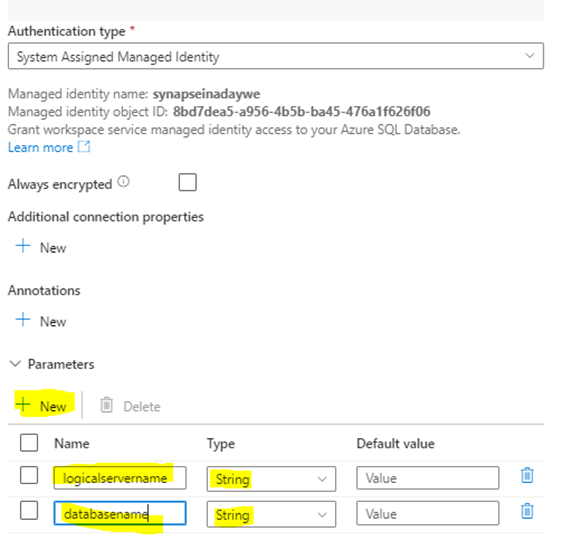
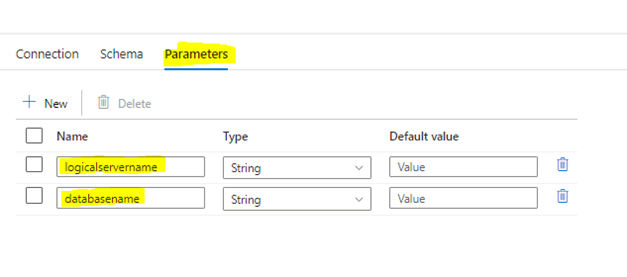
Start off by creating two parameters on the linked service level named “logicalservername” and “databasename“. You can find that at the bottom of the Edit Linked Service Tab. Choose string ast he type and leave the default value blank.
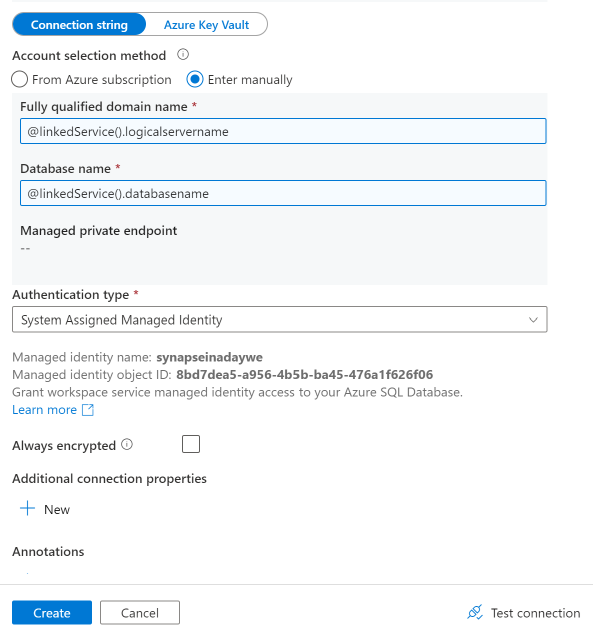
After specifying the parameters, move to the top of tab and change the account selection method to enter manually (instead of from azure subscription) and add dynamic content.
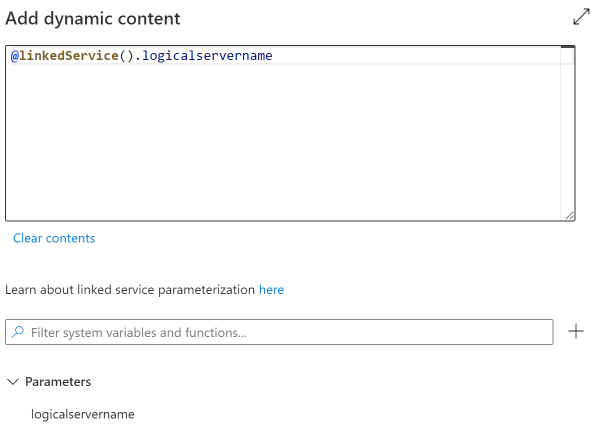
Create and Add a parameter for the logical server name repeat same steps to create a database name parameter. This will allow us to drive the connection string from metadata as well and allows us to reuse this pipeline for various Azure SQL DB sources.
If we look at the authentication method, we have chosen to use the system managed identity. This means that we will need to add the managed identity of the synapse workspace (automatically created for each workspace) as a user to the Azure SQL DB with sufficient rights to read system tables and read from all the tables we want to copy to the lake.
When we hit the create button, hit the OK button on the next screen and our dataset and linked service will be created.
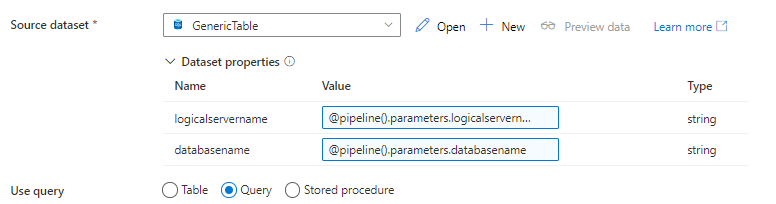
After creating the dataset, open it up again as we need to pass through the parameters we have for the linked service to the actual pipeline.

Create two dataset scoped parameters (under the parameters tab)
and add them to linked service properties dynamic content.
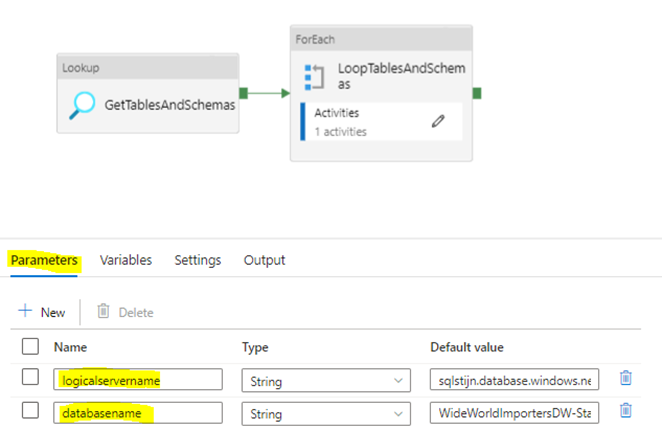
After altering the dataset go back to the pipeline and add two pipeline-based parameters (click anywhere in the pipeline except on an activity and you will see a tab with parameters).
Add these to the dataset properties
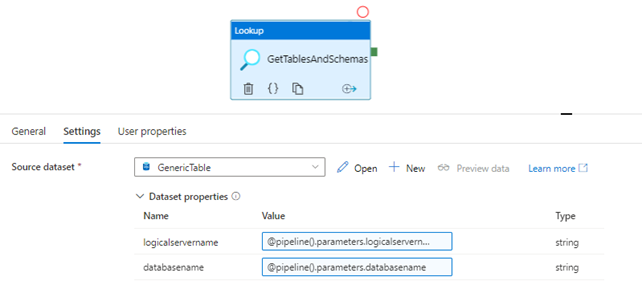
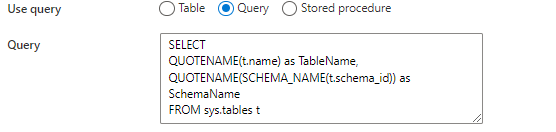
As we are going to fetch all tables, we will not use a single table dataset, so we change this to a query. We will use sys.tables to fetch all schemas and tables of the Azure SQL DB.
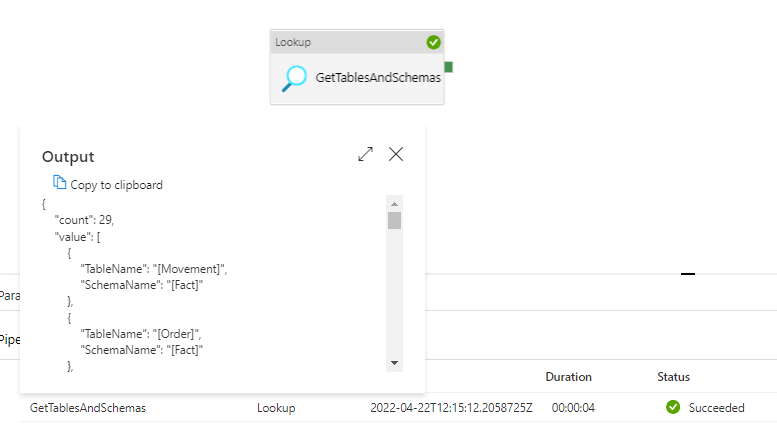
After adding this, debug your pipeline and you should see the following output from the lookup activity.
Setting up the foreach loop
Now that we have the lookup activity set up, we need to use the output of this activity in a foreach loop, in the activities pane click on iterations and conditionals and drag in a foreach loop. Link the lookup to the foreach loop by dragging the green arrow there.

Click on the items pane and add the activity output value node. (As you can see in the output in the image above containing the output of the lookup activity)

After this, click on the activities tab in the foreach task and click on the pencil or just double click the foreach task in the GUI (graphical user interfaces).
Setting up the nested copy data task
From the activities pane click on move and transform and drag in a copy data task. Navigate to the source tab and select the previously created Azure SQL DB dataset.
Add the two pipeline parameters to the dataset properties again and change the use query to Query instead of table.
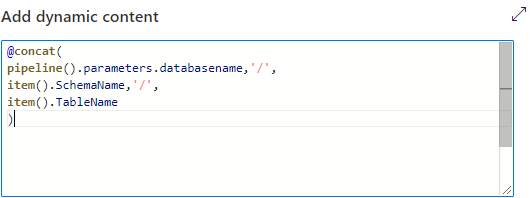
Click in the query field and choose to add dynamic content, we will now build a dynamic expression based on the items passed on by the value output of the lookup activity. (Watch out if these are case sensitive!)

This dynamic expression will select all columns from the table of the current iteration, this concludes the work we need to do on the source tab.
Next up is our Sink (Destination), our sink dataset does not exist yet so we will need to specify the storage account, container, and folder we want to send our data to.
We also need to decide whether we will write to a CSV or a parquet file, in most cases I prefer to use parquet files which is a columnar based file which contains metadata (Data types etc.) about the data that resides in it. It will also give you great compression and the best IO is the IO you do not have to do.
Click on a new sink dataset and look for Azure Data Lake Storage Gen2.
For the file format choose parquet as stated above. As this is again a dataset, this dataset will be linked to linked service (connection string). As we are using Azure Synapse, we can use the primary storage account linked to the synapse workspace.
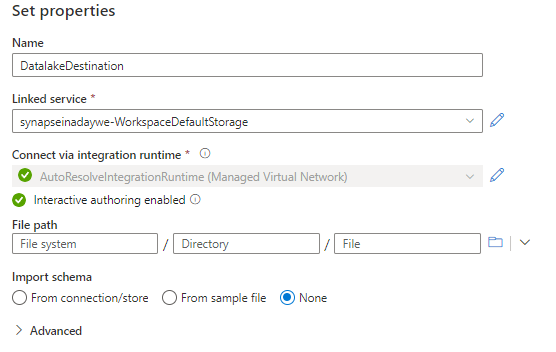
Leave the file path open for now as we will be building that dynamically. Click ok and open the dataset again. Create two dataset-based parameters (on the parameters tab of the dataset), one for Filesystem (Container) and one for Directory. We will not create one for files as we don’t really care about the names of the files. We are working in a data lake so we will be pointing to folders.

Head back over to the pipeline and create a pipeline parameter (click anywhere in the pipeline except on an activity to see the pipeline parameters tab) for the filesystem and add it to the dataset properties of the sink dataset.
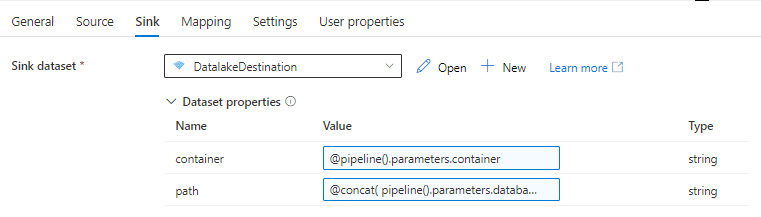
For the path we will use the items from the foreach loop and the database name to build this dynamically.
After adding this the pipeline is ready for publishing and can be used to move data from any Azure SQL DB source to a specific container in your Synapse Linked Storage.
Additional notes
- Column names with spaces are not supported in parquet files
- Certain data types are not supported in parquet files (Geography for example)
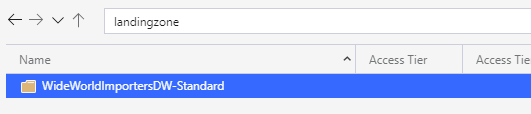
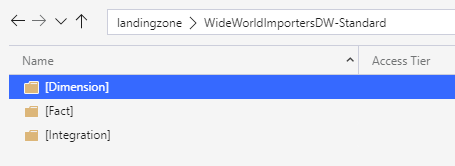
Result
If you followed all the steps above, you should have the following structure in your data lake

This concludes this first blog on moving your data to the lake, this framework can be used for various sources. However, most environments are unique so it can be subject to some changes for edge cases in your environment!
Thank you for reading!